Popup facebook like box widget for blogger increase your facebook page fans by adding beautiful facebook like box popup widget in your blog this widget is very useful and recommended widget for bloggers. Feature this widget will appear after 20 second of page load. This popup widget will show only once not again and again because this widget saves some cookies file in user browser and tell to browser don’t open again and again when user delete this browser cookies file and open again your blog so again 1st time it will be show but after this again save cookies in browser and not will be open again.
It’s a onetime facebook popup like box for blogger
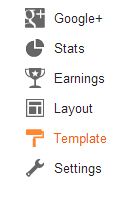
Add below given code in your blogger blog as a widget by HTML/JAVASCRIPT widgetHow to add widget in blogger?
- Go to your blog Layout option > Select Add a Gadget option > select Html/Java Script option > Past the below code in Content area field and press save button.
<!-- Facebook Popup Widget START -->
<script src='http://ajax.googleapis.com/ajax/libs/jquery/2.0.0/jquery.min.js'></script>
<style>
#abt-back {
display:none;
background:rgba(0,0,0,0.8);
width:100%;
height:100%;
position:fixed;
top:0;
left:0;
z-index:99999;
}
#abt-exit {
width:100%;
height:100%;
}
#abt1 {
background:white;
width:420px;
height:270px;
position:absolute;
top:58%;
left:63%;
margin:-220px 0 0 -375px;
-webkit-box-shadow: inset 0 0 50px 0 #939393;
-moz-box-shadow: inset 0 0 50px 0 #939393;
box-shadow: inset 0 0 50px 0 #939393;
-webkit-border-radius: 5px;
-moz-border-radius: 5px;
border-radius: 5px;
margin: -220px 0 0 -375px;
}
#abt-fb-popup {
float:right;
cursor:pointer;
background:url(https://blogger.googleusercontent.com/img/b/R29vZ2xl/AVvXsEhB9QWzHhaWo6LEYKPywzIJcVnp1L_ynFIzvT8G7hzHaVqKFzfpj8rfxkLM6A-wUIU5WcSR5cKZ7smHQmxc6ZfDoipm7EfY0KNkilMi_jZvh6e8q1ZCP8RRI6R6eNxDXrCpecUpIPXwajo/s1600/close.png) repeat;
height:15px;
padding:20px;
position:relative;
padding-right:40px;
margin-top:-20px;
margin-right:-22px;
}
.abt-fb-like {
height:1px;
width:366px;
margin:0 auto;
background:#F3F3F3;
margin-top:16px;
position:relative;
margin-left:20px;
}
#linkit,#linkit a.visited,#linkit a,#linkit a:hover {
color:#80808B;
font-size:10px;
margin: 0 auto 5px auto;
float:center;
}
</style>
<script type='text/javascript'>
//<![CDATA[
jQuery.cookie = function (key, value, options) {
if (arguments.length > 1 && String(value) !== "[object Object]") {
options = jQuery.extend({}, options);
if (value === null || value === undefined) {
options.expires = -1;
}
if (typeof options.expires === 'number') {
var days = options.expires, t = options.expires = new Date();
t.setDate(t.getDate() + days);
}
value = String(value);
return (document.cookie = [
encodeURIComponent(key), '=',
options.raw ? value : encodeURIComponent(value),
options.expires ? '; expires=' + options.expires.toUTCString() : '',
options.path ? '; path=' + options.path : '',
options.domain ? '; domain=' + options.domain : '',
options.secure ? '; secure' : ''
].join(''));
}
options = value || {};
var result, decode = options.raw ? function (s) { return s; } : decodeURIComponent;
return (result = new RegExp('(?:^|; )' + encodeURIComponent(key) + '=([^;]*)').exec(document.cookie)) ? decode(result[1]) : null;
};
//]]>
</script>
<script type='text/javascript'>
jQuery(document).ready(function($){
if($.cookie('popup_user_login') != 'yes'){
$('#abt-back').delay(20000).fadeIn('medium');
$('#abt-fb-popup, #abt-exit').click(function(){
$('#abt-back').stop().fadeOut('medium');
});
}
$.cookie('popup_user_login', 'yes', { path: '/', expires: 7 });
});
</script>
<div id='abt-back'>
<div id='abt-exit'>
</div>
<div id='abt1'>
<div id='abt-fb-popup'>
</div>
<div class='abt-fb-like'>
</div>
<iframe allowtransparency='true' frameborder='0' scrolling='no' src='//www.facebook.com/plugins/likebox.php?
href=http://www.facebook.com/allbloggertips&width=402&height=255&colorscheme=light&
show_faces=true&show_border=false&stream=false&header=false'
style='border: none; overflow: hidden; margin-top: -19px; width: 402px; height: 230px;'></iframe><center>
<span id="linkit"><a href="http://www.allbloggertips.com/2014/05/how-to-add-facebook-popup-like-box.html">Get This Widget</a></span></center>
</div>
</div>
<!-- Facebook Popup Widget END-->
Note Replace allbloggertips with your facebook page ID
After Add above code in your blog check your blog if popup like box will not open so detele your browser cookies and check again your blog.
Thanks I hope your like this post.