


Benefit / Use of Redirect / Divert post- some time
we find visitor landed on a page that is broken (deleted), and some time we
want to create new post about same topic with updated information but our
blogger reader visit our blog with old post Bookmark URL that time we need
divert visitor to another post after reading this post you can Redirect your
one post to another post. This blogger new feature helps you to resolve loosing potential
readers to your blog.
How to Redirect
one Post to another post
|
Follow Below step for redirect post to another post.
Ø Login to
your blogger Account
Ø Select your
Blog.
Ø Click
Settings option after this Click to Search preference option.(See below demo
image).

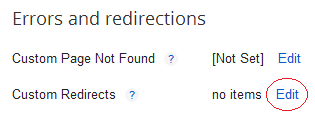
Ø Now Click
edit option front of custom Redirects option in below of Errors and redirection
option. (see below demo image)
Now insert your post URL which you want to redirect, in from
box.
And in to box insert your post URL where you want to redirect
post.(see below demo image)

Note: - in from and to box insert only after main domain
address.
Example –I want redirect my this post http://www.allbloggertips.com/2012/11/demo-url.html
To http://www.allbloggertips.com/2012/11/new-url.html post
So now I insert only /2012/11/demo-url.html in from box and /2012/11/new-url.html in to box.
After insert from and to address
click to save button after that click the save setting button on top.
Now your post is ready to Redirect.


